 Download Complete Project189k | .zip file
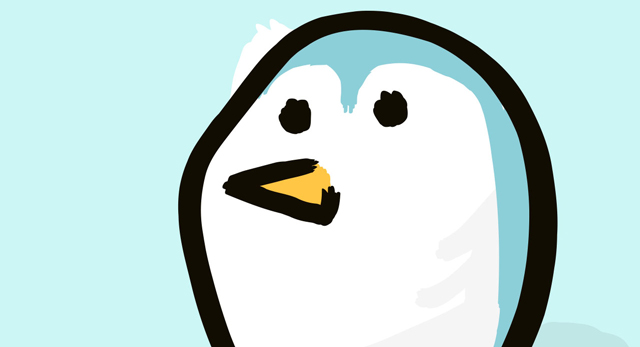
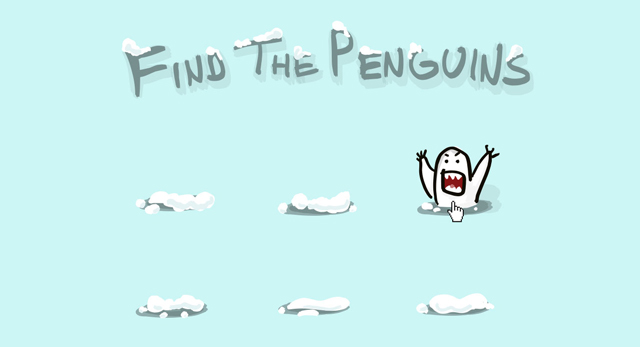
Make a simple game to play with your friends and family. See if you can find all the penguins without waking the yeti!
A great project for: Penguin watchers, yeti hunters, puzzle lovers, and anyone that wants to challenge someone to a battle of adorable wits.
This project is pretty simple but having a little background with HTML, CSS, and Divs will help you unlock its secrets more quickly.
A place to start if you’re unfamiliar with Coder or the basics of CSS and HTML. This project also covers image placement and uploading media files into Coder.
A good introduction to CSS styles and simple div placement and measurement.
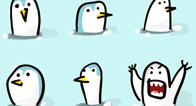
You can use our artwork to get started. Download penguin_pngs.zip here.
Before we start, we need to make sure we have all the image files this project requires. If you haven’t already, download the file at the top of this page called penguin_pngs.zip.
Once you’ve downloaded the zip file make sure it’s in a place you can find it and open it to get at the files inside. It should be full of image files with the "png" extension.
Alright. Let’s start making our cute penguin game. The first thing we need to do is upload all our penguin images.
To finish this step:
Upload all the images in the media folder.
Now that we’ve added all our files let’s start building our game. We’ll be adding a set of divs to our HTML and matching styles in our CSS that create the image above.
What this code is doing:
These divs are defining the structure for our game. Each “penguin” div will be a little bump of snow hiding a penguin (or yeti). We will be adding the images to them in the CSS.
Add the following code to the CSS tab:
What this code is doing:
body is making our background a nice blue color.
#gameholder is making our gameholder div 600px wide and centering it in the screen. It’s invisible, but helps us organize our other elements.
#title is setting a size for our our title div and giving that div a background image. In this case that image happens to be the title/instructions to our game. We’ll add that in the next step.
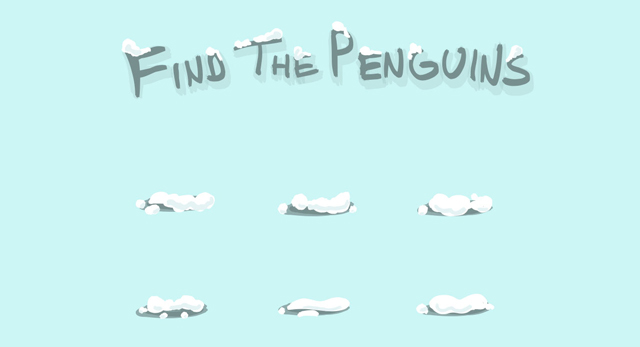
Save and take a look at the preview window. You should see some snow covered lettering that says “Find the Penguins.”
We’ve got our title, let’s add some little snow-covered mounds for our penguins!
Add the following class to the CSS tab:
All of our CSS looks like this so far:
To finish this step:
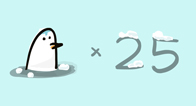
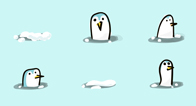
Copy the .penguin1 class and use it to make styles for .penguin2 through .penguin8. Make a .yeti class as well. You’ll find image files for each one labeled in the Media folder.
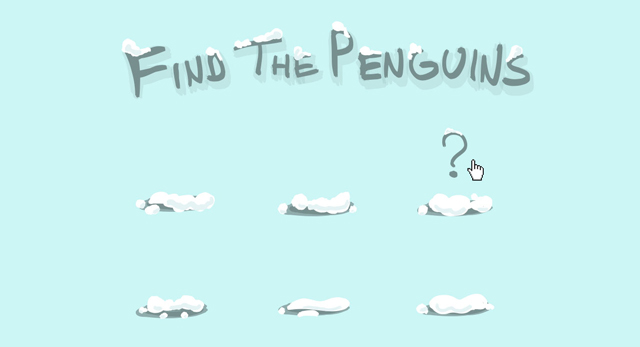
Now let’s add a rollover or :hover effect to each one of our mounds. This will pop up a question mark and jiggle the snow a little adding intrigue and suspense to our game.
This style is what’s called a pseudo-class. It’s a way to add effects and additional styles to elements that we’ve already created. In this case we will be changing the background image of that div when a mouse is over it. We will also be changing the cursor to a pointer, or little hand giving our users another clue that the mound is clickable.
To finish this step:
Make new :hover classes for each of our .penguin and .yeti classes. You can find the images in our media folder.
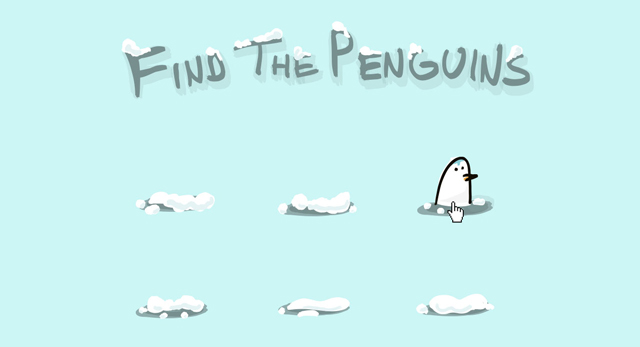
Now that we’ve got our mounds tempting us with those question marks, let’s hide some penguins (and a yeti!) inside each one and use another pseudo-class to make them pop up when clicked.
:active is another type of pseudo-class. Similar :hover it adds/changes the style of .penguin1 when the div is clicked with the mouse.
The position in the code of pseudo-classes is important. An :active class should always come after or underneath :hover in the code for the effect to work properly.
To finish this step:
Make new :active classes for each of our .penguin and .yeti classes. Add penguin images from the media tab. Make sure you hide the Yeti somewhere too.
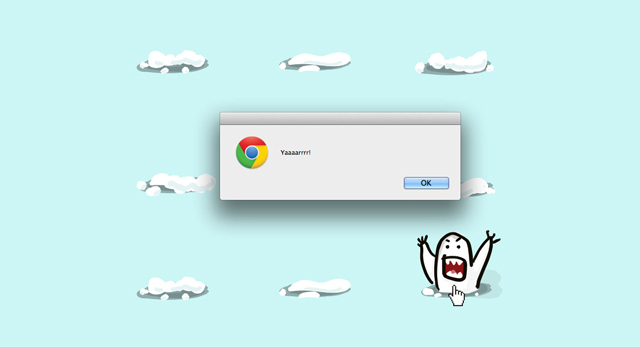
We’ve got all our penguins and yeti in place. Let’s add a yeti alert that will pop up when the yeti is clicked!
This is a little bit of Javascript and jQuery that will pop up a browser alert with the text “Yaaaarrrr” when you press your mouse button on the yeti. Try it out in the preview mode. To learn more about Javascript try playing around with the Night and Day project next.
Now that we’ve got all our penguins (and yeti) hidden let’s play the game! Find a friend or a family member and challenge them to find all the penguins without accidently clicking on the yeti.
After they’ve had a go, mix the classes up in your HTML to reshuffle the mounds and let them try again. To make it extra challenging, change the images in the :active states to put different penguins (and your yeti) under different mounds.
To finish this step:
Teach your playing partner how to change the images in the :active states and trade off challenging each other to a game of “Find the Penguins.”
Once you’ve mastered the game we’ve built together, see if you can make it bigger and better.
Why not make it more challenging. Double or triple the number of mounds to make the game more difficult! You can use the same penguin png files more than once if you like but you’ll need to make more divs and classes.
See if you can use Javascript and jQuery to make the penguins stay up when clicked and disappear when the yeti is awoken. If you’re not sure how to do that try finishing the Night and Day project to learn some tricks.

If you feel like your penguin game is lacking certain level of auditory awesomeness try adding some sound effects to each click. You’ll probably need to learn a little bit about audio files. Fortunately, our Music Boxes project covers those subjects.
Making interactive things is kinda cool. Try these projects next, if you want to make your mouse clicks even more powerful.
Ever wish you could control the universe? Well now you can pretend with this project. Change day into night and back again with the click of a mouse and learn a whole new programming language along the way.
Open Project
Let’s turn it up. This project will transform your browser into a simple instrument that you can use to make music.
Open Project